Once you learn this pattern, oh let us tell you, it'll open up a world of endless possibilities! Not only are the colors chic, they're a great conversation starter too. So you can place your new afghan on your couch, your bedroom, or even your car and it'll surely catch some eyes. Try the free pattern below or get the ad-free printable PDF pattern here.
At this moment, Lily's Garden Striped Granny afghan is running as a CAL (crochet-a-long.) I thought it would be amazing to see and use striped granny pattern, how you finish, and share your project with the cyber world! Do you see the SUBMIT link in the menu? Use that to send in your pics. You may use an alias if you wish or link to your shops for full credit.
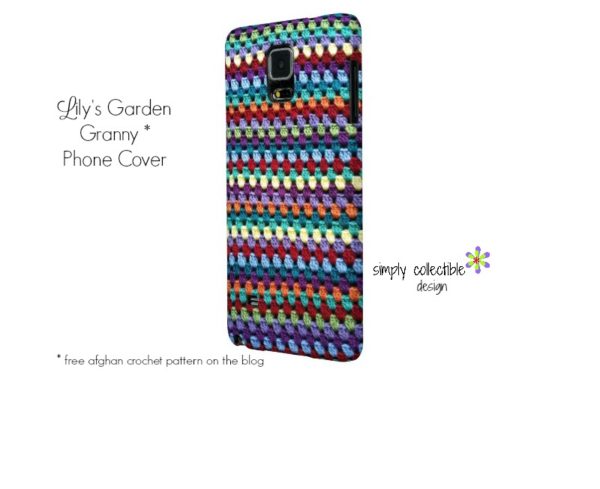
Now you can even have the matching phone cover!
Now, let's have some fun and see what you can do! Are you concerned about all those ends? Don't be! How about fringe?
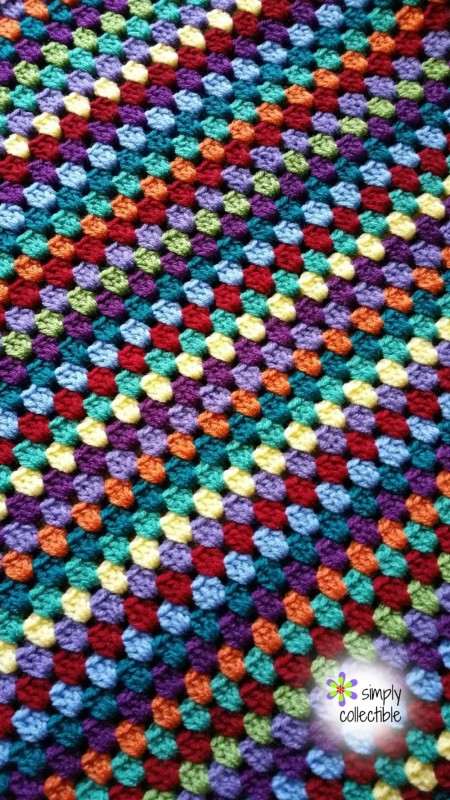
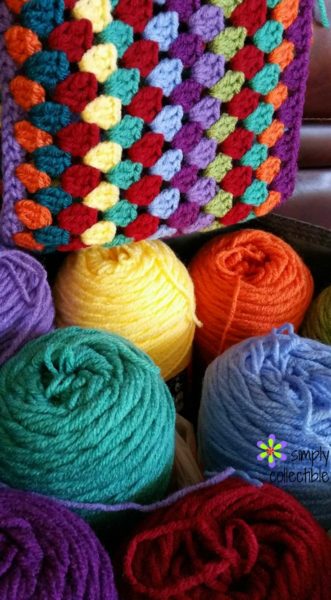
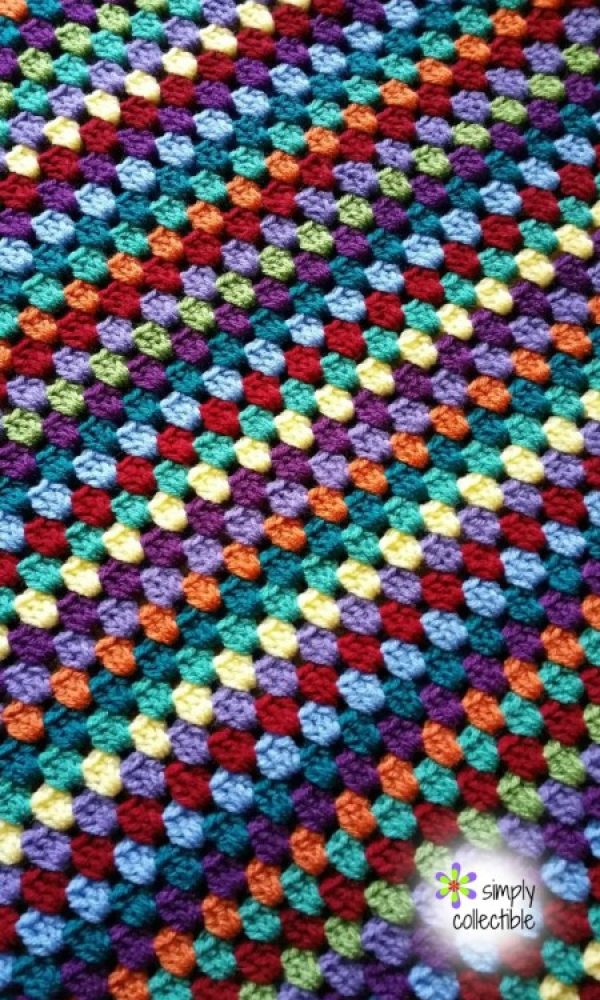
You may be wondering how to go about selecting colors. I knew I wanted to use about 9 different colors to represent squashes, lettuces, leaves, grass, grapes, and berries. With that in mind and images of autumn, I was off to select some of my favorites. I ended up with 13. I felt if I used them all, there wouldn't be much of a contrast between them all so I decided to start with 5 as a base color (main color) and 4 to highlight. My ratio for creating the pattern would be 2 rows of base color to 1 row of highlight. The entire blanket is created this way!

You may, for example, prefer pastels for your base colors and whites or creams for your highlights. I think browns or greys with corals and pinks would be very interesting. Be sure to tell us your ideas.
UPDATE: Marie from Underground Crafter has created a fantastic recording of my pattern if you need assistance. Scroll down to hear the recorded pattern. (She had my full permission to record my pattern this way. She did not break copyright.)
Skill Level: Easy
Materials:
Hook: US Size I/9 (5.5 mm) crochet hook or size needed to obtain gauge
Yarn:
- 3300 [5100] yds worsted weight yarn in assorted colors (see Color Sequence).
Notions:
- Scissors
- Yarn needle
Size:
Small [Large]
45 x 52 [77.5] inches
Gauge:
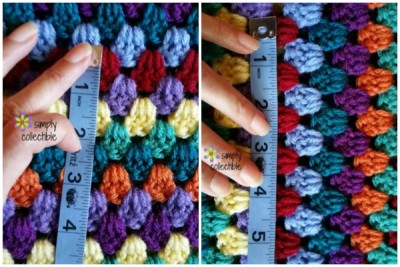
In pattern, 13 dc (4.5 shells) x 7 rows = 4 inches.
This pattern uses US crochet terms
| ABBREVIATIONS | DESCRIPTION |
|---|---|
| ch | Chain |
| dc | Double crochet |
| rnd | Round |
| sc | Single crochet |
| sk | Skip |
| sl st | Slip stitch |
| st(s) | Stitch(es) |
| yo | Yarn over |
Color Sequence:
Get the ad-free printable PDF pattern here.
Change colors as desired. You will need approximately 30-35 yds of yarn per row. The color sequence pictured uses 9 colors in the following order:
Row 1: Light Purple
Row 2: Orange
Row 3: Teal
Row 4: Red
Row 5: Yellow
Row 6: Turquoise
Row 7: Red
Row 8: Blue
Row 9: Purple
Row 10: Light Purple
Row 11: Green
Row 12: Red
Row 13: Turquoise
Row 14: Orange
Row 15: Purple
Row 16: Teal
Row 17: Blue
Row 18: Red
Row 19: Light Purple
Row 20: Yellow
Row 21: Turquoise
Row 22: Teal
Row 23: Orange
Row 24: Light Purple
Row 25: Purple
Row 26: Yellow
Row 27: Turquoise
Row 28: Red
Row 29: Blue
Row 30: Teal
Row 31: Purple
Row 32: Green
Row 33: Light Purple
Row 34: Red
Row 35: Orange
Row 36: Turquoise
Row 37: Teal
Row 38: Blue
Row 39: Purple
Row 40: Red
Row 41: Yellow
Row 42: Light Purple
Row 43: Turquoise
Row 44: Green
Row 45: Purple
This color sequence is repeated 2 times for the small blanket and 3 times for the large blanket.
Special Stitches:
Foundation Single Crochet (fsc): This technique makes the foundation chain and the first row of single crochet stitches at the same time.
First fsc – Ch 2, pull up a loop in 2nd ch from hook, yo and pull through one loop on hook (foundation ch made), yo and pull through both loops on hook (sc made).
Remaining fsc – Insert hook in foundation ch of previous fsc, pull up a loop, yo and pull through one loop on hook (foundation ch made), yo and pull through both loops on hook (sc made).
Standing double crochet (standing dc): (Used when joining a new yarn, counts as a dc). Leaving a tail, wrap yarn around hook twice to create two yarn overs, insert hook into indicated st and pull up a loop, [yo and pull through 2 loops on hook] twice.
Shell: 3 dc in indicated st.
Get the ad-free printable PDF pattern here.
Pattern:
Do not turn your work. Start each row from the same side, changing colors as desired.
Row 1: 148 fsc, fasten off. (148 sts)
Row 2: (Standing dc, dc) in first st, sk next 2 sts, [shell in next st, sk next 2 sts] across to last st, 2 dc in last st, fasten off. (4 dc, 48 shells)
When working in the sp before a shell or stitch, this is not a chain space. Place your stitches in the empty area between the posts of the stitches on the previous row.
Row 3: Standing dc in first st, sk next st, [shell in sp before next shell, sk next shell] across to last 2 sts, shell in sp before last 2 sts, sk next st, dc in last st, fasten off. (2 dc, 49 shells)
Row 4: (Standing dc, dc) in first st, sk next shell, [shell in sp before next shell, sk next shell] across to last st, 2 dc in last st, fasten off. (4 dc, 48 shells)
Rows 5-90 [134]: Repeat rows 3-4 43 [65] times
Large size only – Row 135: Repeat row 3 once more.
Edging rnd: Join any color with sl st in first st, ch 1, 3 sc in first st, sc in each st across to last st, 3 sc in last st, working in sides of rows, 169 [252] sc evenly spaced across to bottom, working in bottom of row 1, 3 sc in first st, sc in each st across to last st, 3 sc in last st, working in sides of rows, 169 [252] sc evenly spaced across to top, join with sl st in first st.
Border:
Join rnds where indicated with a sl st in the first st of the rnd.
Rnd 1: With A, ch 1, turn, 3 sc in first st, place marker in the 2nd of the 3 sc just made, sc in each st across to last st, 3 sc in last st, place marker in the 2nd of the 3 sc just made, working in sides of rows, sc in each row across, working in bottom of foundation ch, 3 sc in first ch, place marker in the 2nd of the 3 sc just made, sc in each ch across to last ch, 3 sc in last ch, place marker in the 2nd of the 3 sc just made, working in sides of rows, sc in each row across, join. (476 sc, 4 corner markers placed)
Rnd 2: Ch 1, [sc in each st across to next marker, 3 sc in marked st] 4 times, sc in each remaining st across, join. (324 sc)
Fasten off.
Weave in all ends.
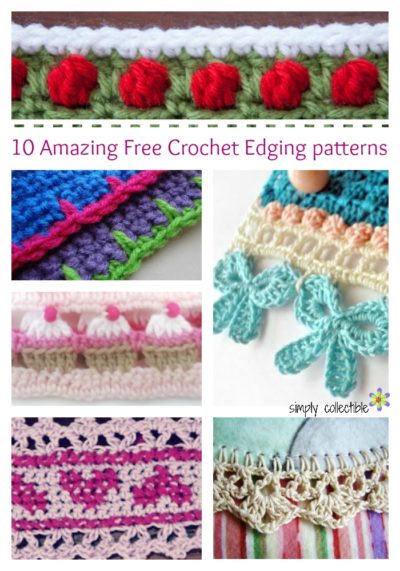
You could leave this as is or choose from different borders to complete your look. Check out my roundup of 10 Amazing Free Crochet Edging patterns, Click HERE. If you can share any links for edgings, just comment below. Be sure to send your pictures in of how things are going. I'll try to keep up and add them all to a feature page.
Here is Marie (Underground Crafter‘s) recording promised. Thank you, Marie!
Looking for more great crochet patterns: How to Crochet a Granny Square Beginner’s Guide with 20 Patterns
Carmelo
Thursday 16th of November 2017
Wonderful, what a weblog itt is! This website gives helpful facts to us, keep it up.
gill
Sunday 7th of February 2016
looks very interesting - one i will do thankyou
Celina
Monday 8th of February 2016
Fun, Gill~ Thanks for coming by!
Crochet Hooks
Saturday 6th of February 2016
beautiful! love all the colors and how lovely when all complete! Saving this for a new project!
Celina
Saturday 6th of February 2016
Hi! Thank you so much! Glad to see you here.