Out for a run? Stay warm while keeping your hair out of the way with this pattern that's made with those messy buns (that we all love!) in mind. You'd definitely need one as it holds a lot of purpose as it's both chic and functional. It's also a cute pattern for those who're not buns fans, but still want their hair away from their face. You can opt for a beanie finish! Ain't that the best? Great for beginners, the pattern is below, or get the ad-free printable PDF pattern here.
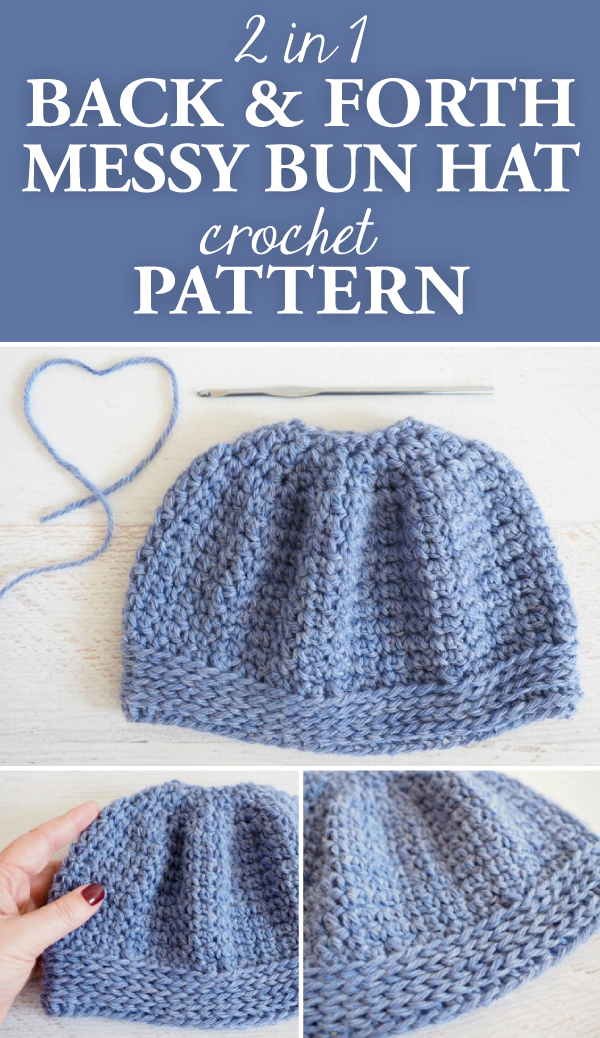
Back and Forth Messy Bun Hat Crochet Pattern
It’s no secret that I’m a huge fan of messy bun hats! I have plenty of patterns as proof.
So, why add another pattern, you ask?
I’m pretty proud of this pattern because of its versatility. What makes it different from the other cute messy bun hats is that it can be made into a beanie as well.
One pattern, two finishing options. That’s basically a two for one, right?
This hat pattern has a really retro vibe to me due to its more rounded shape. Plus, mustard always has me feeling vintage.
This messy bun hat can be turned into a beanie by simply pulling the tail to cinch it closed. Or, keep it as a messy bun hat by sewing in your ends.
It uses alternating stitches for a simple texture, and it’s perfect for anyone who loves a little retro in their lives.

Back and Forth Messy Bun Hat Crochet Patter
Skill Level: Easy
Materials:
• Hook
– US Size J/10 (6 mm) crochet hook or size
needed to obtain gauge
• Yarn: 175 yds worsted weight yarn
• Notions:
– Scissors
– Yarn needle
Size:
• – 24 inches circumference at brim
Gauge:
11 sc x 9 rows = 4 inches
| ABBREVIATIONS | DESCRIPTION |
|---|---|
| ch | Chain |
| dc | Double crochet |
| hdc2tog | Half double crochet next 2 stitches together |
| hdc | Half double crochet |
| rnd | Round |
| sc | Single crochet |
| sl st | Slip stitch |
| st(s) | Stitch(es) |
Pattern
Join rnds where indicated with a sl st in the first st of the rnd.
Do not start rnds with a ch unless indicated.
Ch 16. Being careful not to twist the chain, join with a sl st in first ch to form a loop.
Rnd 1: Hdc in each ch around, join. (16 hdc)
Rnd 2: (Sc, dc) in each st around, do not join. (16 sc, 16 dc)
Rnd 3: Dc in first sc, sc in next dc, [dc in next sc, sc in next dc] around, do not join.
Rnd 4: Repeat rnd 2. (32 sc, 32 dc)
Rnd 5: Dc in first sc, sc in next dc, [dc in next sc, sc in next dc] around, do not join.
Get the ad-free printable PDF pattern here.
Rnd 6: Sc in first dc, dc in next sc, [sc in next dc, dc in next sc] around, do not join.
Rnds 7-14: Repeat rnds 3-4 4 times. At the end of rnd 14, join.
Rnd 15: Ch 1, hdc in each of first 6 sts, hdc2tog, [hdc in each of next 6 sts, hdc2tog] around, join. (56 sts)
The third loop of an hdc is located at the back of the stitch, below the front and back loops.
Rnds 16-19: Ch 1, hdc in third loop of each st around, join. Fasten off.
Optional: To close your hat into a beanie, weave the starting tail through the stitches of rnd 1 and pull tight to close. Weave in all ends.
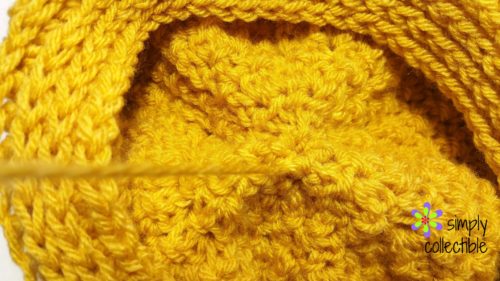
Make it a beanie: Turn your hat inside out and grab the tail on the top of your hat. Thread it through your yarn needle sewing your top stitches together by moving back and forth between the stitches. (See the next image.)
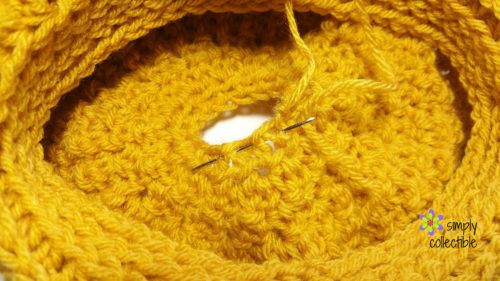
Work the needle through the stitches all the way around and gently pull the tail to cinch the top closed. (See the next image.) Weave the tail in to finish off.
Caroline
Monday 6th of February 2023
I guess I'm just not understanding your instructions properly..I cannot figure out why my project is ending up with almost 3 times the number if not more of stitches needed in round 15... it must be my misunderstanding of the repeating rounds. Wish you had a better written pattern. I'm giving up.
Sue
Sunday 2nd of July 2023
@Caroline, I did the repeats with rows 5 and 6 instead of rows 3 and 4 then the number of stitches works out to the stitch count after the decrease row. I think the pattern needs to be corrected.
Jacklyn
Saturday 7th of January 2023
It would be nice if there were stitches needed for different sizes. I want to make one for Mom, Dad, and 3 yr old daughter.