Stitch with the basics, and get a classic bun hat with this pattern. We love how it's easy to do, and you have options to how it'll look in the end! Run with a bun or keep you warm while outside? You choose! See the free pattern below or get the ad-free printable PDF pattern here.
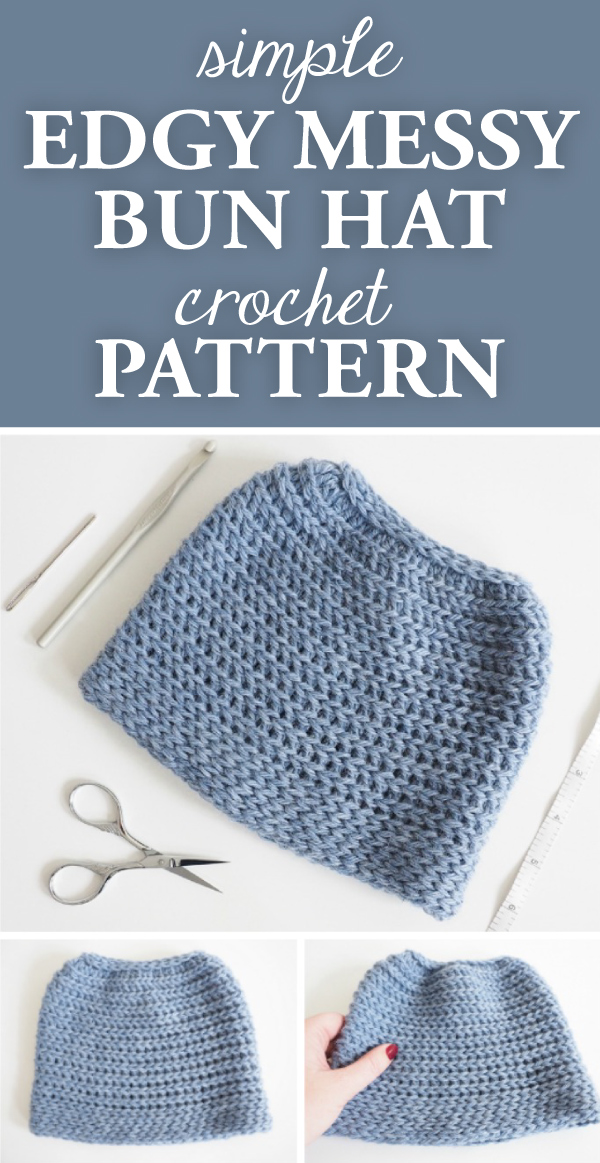
Simple Edgy Messy Bun Hat Crochet Pattern
Need a classic hat pattern?
Look no further. This messy bun hat pattern has a very clean, traditional, and put together style. It uses a 3rd loop stitch combined with traditional single, double, and half double crochet stitches to create crisp, linear lines.
I love making these for my co-workers because the pattern is just so clean and simple that it’s a safe bet for anyone.
Not confident enough yet to make this hat? I can help you learn how to crochet a hat in just a few hours. Learn the foundation of making any hat in my Crochet Fundamentals class. Learn the basics and then move on to any pattern after this skill building course. Watch the video classes free for 2 days here.
The messy bun hat is unique enough in concept, but when paired with this simpler texture, it makes it the perfect item for friends who like a more minimalist look.
You could even introduce a second color for alternating stripes to customize the look.
This pattern is also versatile in that it can be made into a full beanie.
This is a great pattern for all levels of crocheters.
Go forth and happy crocheting!
Simple Edgy Messy Bun Hat Crochet Pattern
Skill Level: Easy
Materials:
Yarn:
200 yds worsted weight yarn
Hook:
US size I/9 (5.5mm) crochet hook or size needed to obtain gauge
Notions:
Scissors
Tapestry needle
Size:
Circumference: 19.75 inches at opening Length: 8 inches
Gauge:
12 sts = 4.25 inches
Get the ad-free printable PDF pattern here
Pattern uses US crochet terms
| ABBREVIATIONS | DESCRIPTION |
|---|---|
| ch | Chain |
| dc | Double crochet |
| hdc | Half double crochet |
| sc | Single crochet |
| sl st | Slip stitch |
| st(s) | Stitch(es) |
| yo | Yarn over |
Notes:
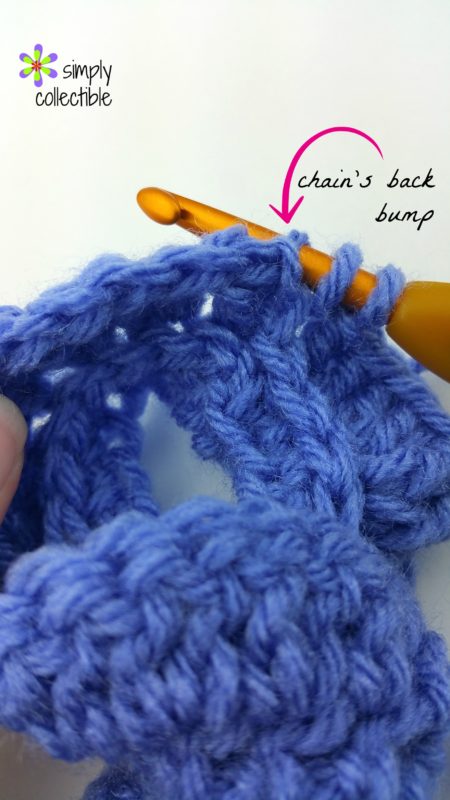
The 3rd Loop is also known as the back bump of the stitch. It is the loop behind the back loop.
Pattern:
Chain 28, join with a sl st in first ch being careful not to twist.
Round 1: Ch 2 (does not count as a st), hdc in each chain around, join with a sl st in the top of the beginning ch. (28 hdc)
Round 2: Ch 2, working in the 3rd loop of each st, 2 dc in each around, join with a sl st in the top of the beginning ch. (56 dc)
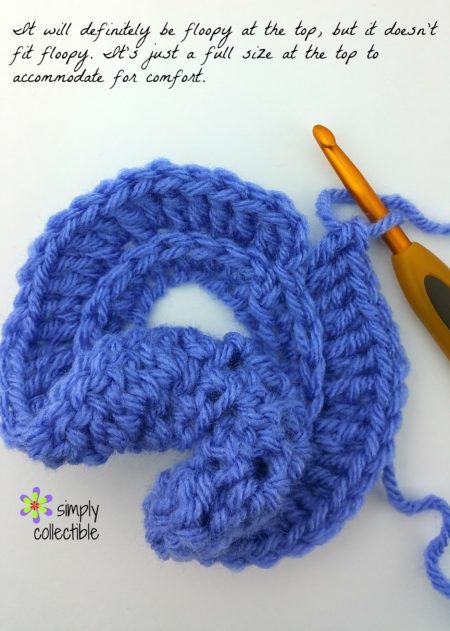
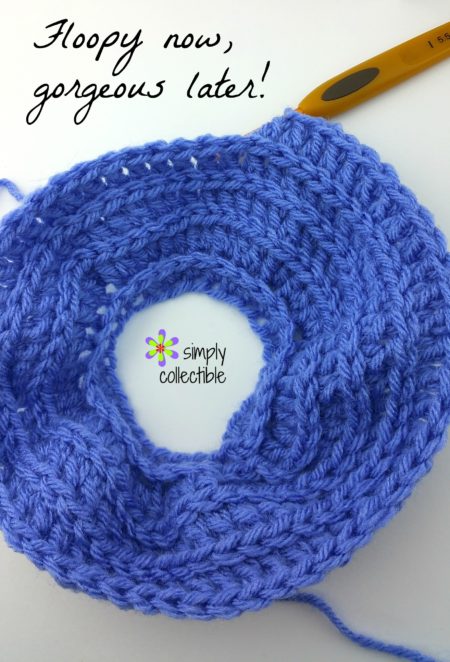
It will be floopy at the top, but it doesn’t fit floopy. It’s just a full size at the top to accommodate for comfort.
Rounds 3-11: Ch 2, dc in the 3rd loop of each st around, join with a sl st in the top of the beginning ch.
Rounds 12-14: Ch 2, hdc in the 3rd loop of each st around, join with a sl st in the top of the beginning ch.
Rounds 15-16: Ch 1, sc in the 3rd loop of each st around, join with a sl st in the first st.
Finishing
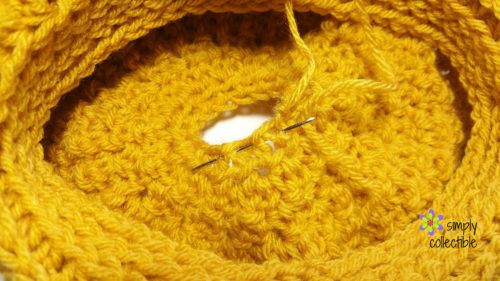
Fasten off, and sew in the ends.
To make a full Beanie: You can hdc2tog (hdc decrease) around the top opening 1 or 2 rows depending on the height you want and weave it together like this!
Get the ad-free printable PDF pattern here
flyovercindy
Tuesday 28th of November 2023
Thank you for the free pattern(s), they are cute and look trendy. I would like to suggest however, that you show them being modeled on a person? They aren't difficult or too time-consuming, but I have made a couple of these, and while they looked like the pictures of the hat, they were not what I was hoping for while actually being worn. Thanks!
Gail D Catalano
Tuesday 28th of November 2023
I like the hat i am going to try and make one for Christmas thanks Gail
Cheri
Tuesday 31st of October 2023
Hi thank you for the free patterns. .looking forward to making some of the messy bum hats. For my friends. Do you have a breast cancer messy beanie hat. Have a friend who has started chemo and is starting to loose her hair. I was thinking of maybe using a white braid like Elsas from Disneys Frozen movies. To the top of the messy bun beanie. Do she. Could have some fun with it. Do you have anything like this? Also do you have any children's messy hat beanie?
Thank you. Cheri.