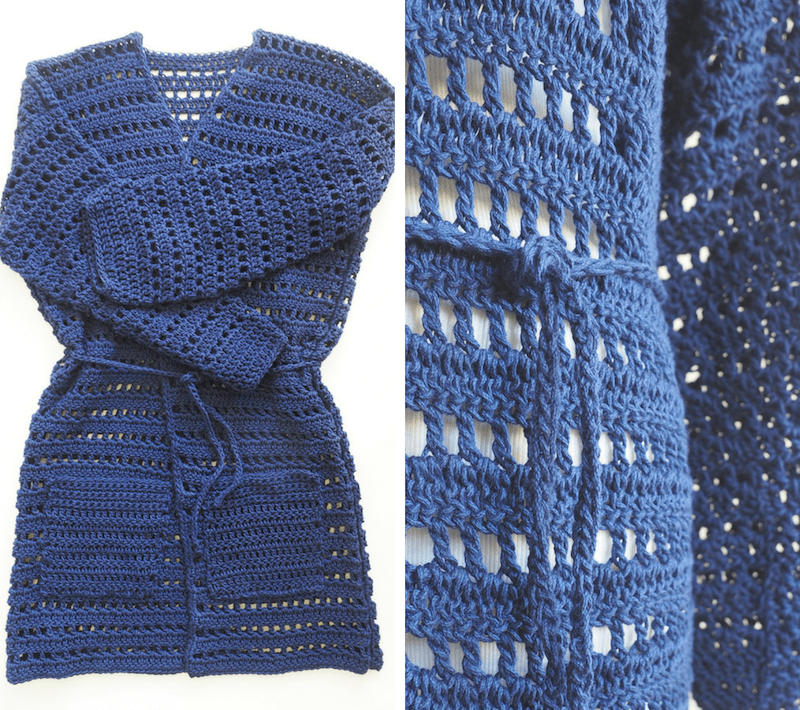
Belted Kimono Cardigan Crochet Pattern
If you’re looking for a new favorite crochet project, check out the Belted Kimono Cardigan. Ever since we laid eyes on this pattern, we’ve been obsessed. And we’re betting you will be too.
This crochet cardigan is perfect to wear in Fall or Summer, and you can brag that you made it yourself. You can belt up this kimono and stay warm and cozy during the colder months. Or you can let it loose for a lightweight wrap on a summer night. This type of crochet design is perfect to help keep you warm and cozy without requiring a jacket.
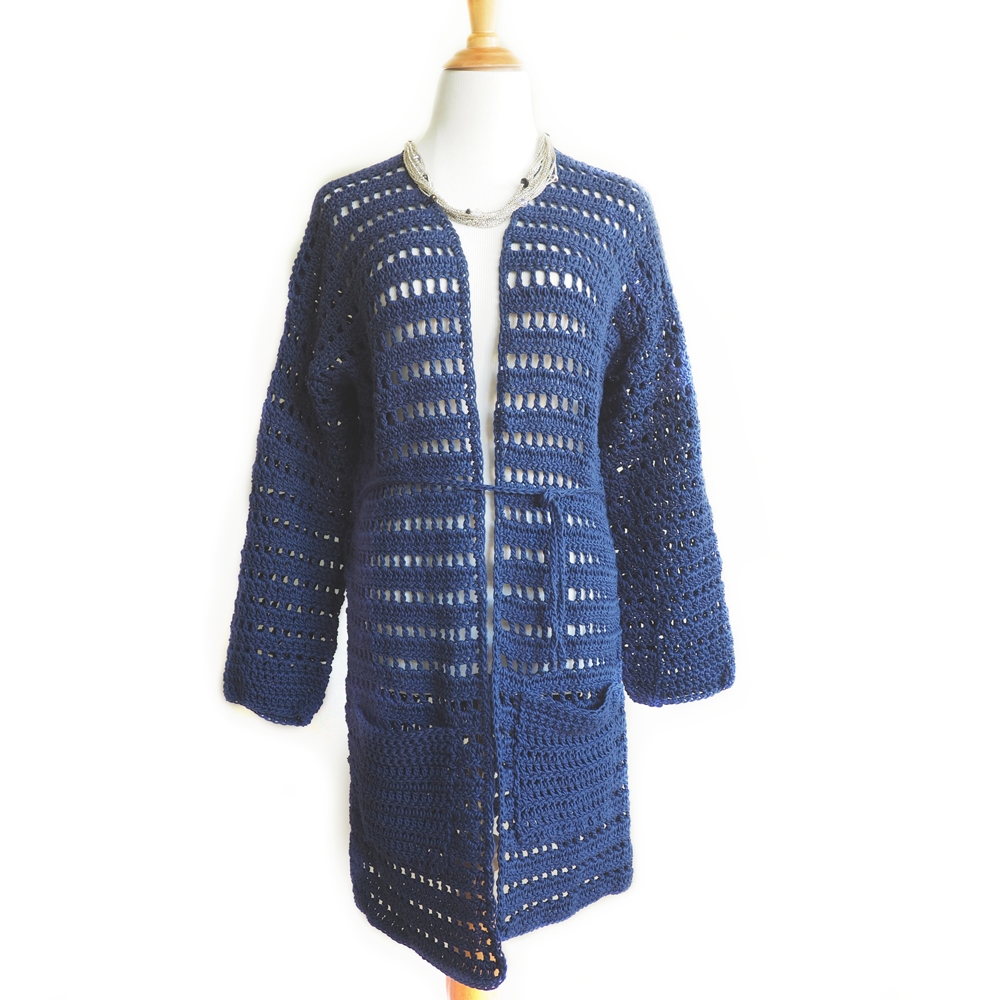
Once you see how flattering this belted cardigan is, you’ll never want to take it off. It will easily become your go-to piece.
We crafted our kimono cardigan in a classic blue so you can pair it with anything year-round. But if you’re feeling adventurous,try making a second wrap in poppy red, or sweet lavender.
Whatever your style, this piece will fit right in and have you reaching for it everytime.
Belted Kimono Cardigan Crochet Pattern
Skill Level: Intermediate
Hook(s) size: 5mm hook
Yarn weight: Worsted
Suggested yarn: 9 skeins of Cascade Avalon yarn in Medieval Blue
Yarn Yardage: Approx 1575 yds
Tools – scissors, tapestry needle
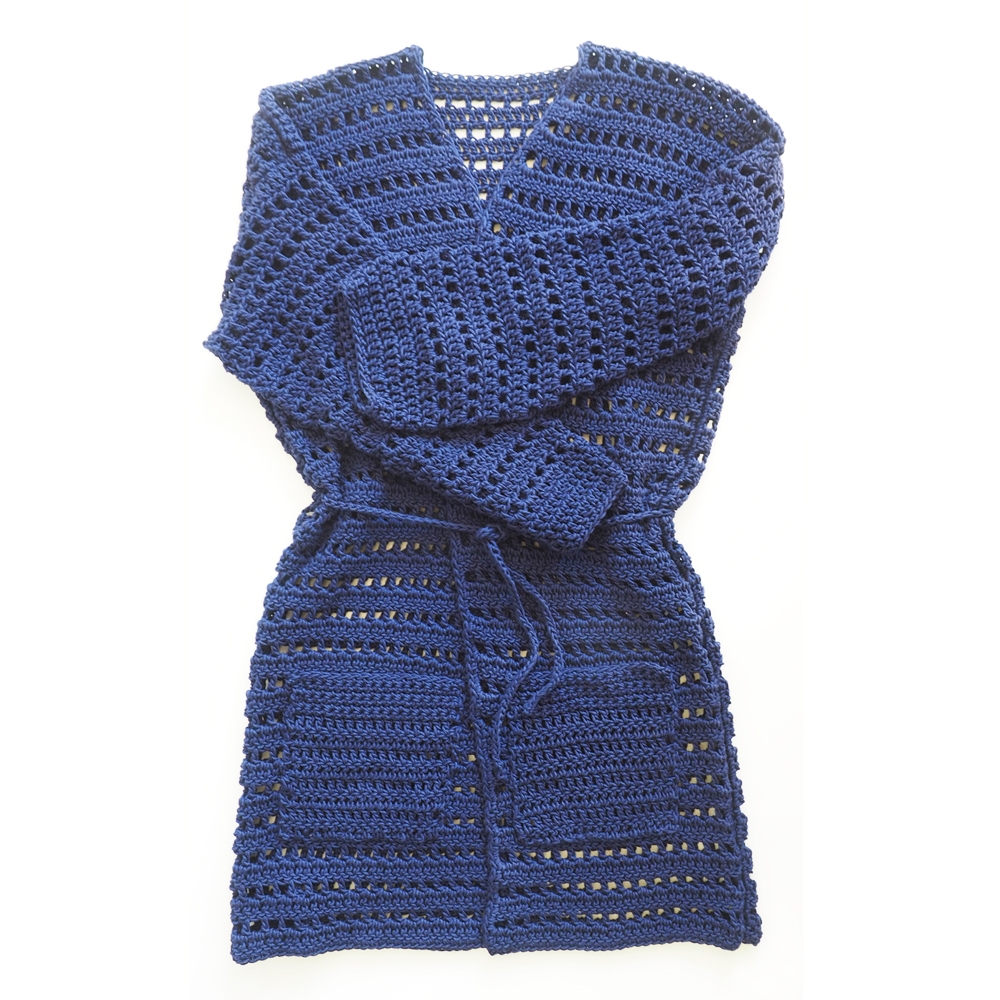
Approx. finished dimensions: (Size M) Sweater: Length 30” Width 21” Sleeves: 17” long
Pattern details: 1 Back piece, 2 front panels, 2 sleeves, 2 pockets, 1 belt cord.
Special notes (anything important that should be added):
- Stitches used: Double crochet, single crochet
- FDC – foundation double crochet, ch – chain, st(s) – stitch(es), dc – double crochet, sc – single crochet, sl/st – slip stitch, dc2tog – double crochet 2 together
- Ch 4 counts as a dc and ch sp; ch 3 counts as a dc.
- Dc into the top of the ch 3 at the end of each row
The pattern
Back of sweater
FDC 69
Row 1: Ch 4, turn. Skip 1 st, dc into the following st. *Ch 1, skip 1 st, dc into the following st; repeat from * to end – 69 sts
Row 2: Ch 3, turn. *Dc into the ch 1 space from the previous row, dc into the next st; repeat from * to end – 69 sts
Row 3-50: Repeat Rows 1 and 2
Sc around the whole piece. When you get to the sides, follow the same instructions as Row 2, using sc instead. Sl/st into the first sc.
Cut yarn and tie off
Sweater Panels
Panel A:
FDC 27
Row 1: Ch 4, turn. Skip 1 st, dc into the following st. *Ch 1, skip 1 st, dc into the following st; repeat from * to end – 27 sts
Row 2: Ch 3, turn. *Dc into the ch 1 space from the previous row, dc into the next st; repeat from * across. In the last ch 1 sp, work 3 dc. Dc into the last st – 29 sts
Row 3: Repeat row 1 – 29 sts
Row 4: Repeat row 2 – 31 sts
Row 5: Repeat row 1 – 31 sts
Row 6: Repeat row 2 – 33 sts
Row 7: Repeat row 1 – 33 sts
Row 8: Repeat row 2 – 35 sts
Row 9: Repeat row 1 – 35 sts
Row 10: Ch 3, turn. *Dc into the ch 1 space from the previous row, dc into the next st; repeat from * to end – 35 sts
Row 11-50: Repeat rows 1 and 10
Cut yarn and tie off.
Panel B:
FDC 27
Row 1: Ch 4, turn. Skip 1 st, dc into the following st. *Ch 1, skip 1 st, dc into the following st; repeat from * to end – 27 sts
Row 2: Ch 3, turn. Work 3 dc into the first ch 1 sp from the previous row, dc into the following st. *Dc into the ch 1 space from the previous row, dc into the next st; repeat from * to end – 29 sts
Row 3: repeat row 1 – 29 sts
Row 4: Repeat row 2 – 31 sts
Row 5: Repeat row 1 – 31 sts
Row 6: Repeat row 2 – 33 sts
Row 7: Repeat row 1 – 33 sts
Row 8: Repeat row 2 – 35 sts
Row 9: Repeat row 1 – 35 sts
Row 10: Ch 3, turn. *Dc into the ch 1 space from the previous row, dc into the next st; repeat from * to end – 35 sts
Row 11-50: Repeat rows 1 and 10
Cut yarn and tie off.
Sc around the edges of both panels the same way as the back piece.
With the wrong side of panel and back of sweater facing out, attach the skinnier end of the panel to the back of the sweater along the shoulder. Pin along the side leaving a 9.5” opening for the armhole; stitch from the bottom of the armhole, down the side. Repeat for the other panel.
Sleeves (make 2)
Ch 54. Sl/st into the first ch making sure it's not twisted.
Round 1: Ch 3. Dc into each st; sl/st into the top of ch 3 – 54 sts
Round 2: Ch 4, skip 1 st, dc into the following st. *Ch 1, skip 1 st, dc into the following st; repeat from * around. On last dc, ch 1 and sl/st into 3rd ch from beginning ch 4 – 54 sts
Round 3: Ch 3, dc into each of the next 15 sts then dc2tog. *Dc into each of the next 16 sts then dc2tog; repeat from * one time. Sl/st into top of ch 3 – 51 sts
Round 4: Ch 4, skip 1 st, dc into the following st. *Ch 1, skip 1 st, dc into the following st; repeat from * around. On last dc, ch 1 and sl/st into 3rd ch from beginning ch 4 – 51 sts
Round 5: Ch 3. Dc into each st; sl/st into the top of ch 3 – 51 sts
Round 6: Ch 4, skip 1 st, dc into the following st. *Ch 1, skip 1 st, dc into the following st; repeat from * around. On last dc, ch 1 and sl/st into 3rd ch from beginning ch 4 – 51 sts
Rounds 7-10: Repeat rounds 5 and 6 – 51 sts
Round 11: Ch 3, dc into each of the next 14 sts then dc2tog. *Dc into each of the next 15 sts then dc2tog; repeat from * one time. Sl/st into top of ch 3 – 48 sts
Rounds 12-18: Repeat rounds 5 and 6 – 48 sts
Round 19: Ch 3, dc into each of the next 13 sts then dc2tog. *Dc into each of the next 14 sts then dc2tog; repeat from * one time. Sl/st into top of ch 3 – 45 sts
Round 20: Repeat round 4 – 45 sts
Round 21: Repeat round 5 – 45 sts
Round 22: Repeat round 4 – 45 sts
Round 23: Ch 3, dc into each of the next 12 sts then dc2tog. *Dc into each of the next 13 sts then dc2tog; repeat from * one time. Sl/st into top of ch 3 – 42 st
Round 24: Repeat round 4 – 42 sts
Round 25: Ch 3, dc into each of the next 11 sts then dc2tog. *Dc into each of the next 12 sts then dc2tog; repeat from * one time. Sl/st into top of ch 3 – 39 sts
Round 26: Ch 3, dc into each of the next 10 sts then dc2tog. *Dc into each of the next 11 sts then dc2tog; repeat from * one time. Sl/st into top of ch 3 – 36 sts
Round 27: Repeat round 5 – 36 sts
Round 28: Ch 3, dc into each of the next 9 sts then dc2tog. *Dc into each of the next 10 sts then dc2tog; repeat from * one time. Sl/st into top of ch 3 – 33 sts
Round 29: Ch 1, sc into each st around. Sl/st into ch 1, cut yarn and tie off – 33 sts
Turn sleeve and sweater inside out. Using a tapestry needle, sew the larger end of the sleeve around on to the armhole. Repeat for the other sleeve.
Pockets (make 2)
Ch 22
Row 1: Dc into the 4th ch from the hook and into each ch across – 18 sts
Row 2-8: Ch 3, turn. Dc into each st across – 18 sts
Row 9-14: Ch 1, turn. Sc into each st across – 18 sts
Cut yarn and tie off. Sew pocket onto the front of panel with the bottom of the pocket approx. 4” from the bottom of the front panel. Repeat for the other side.
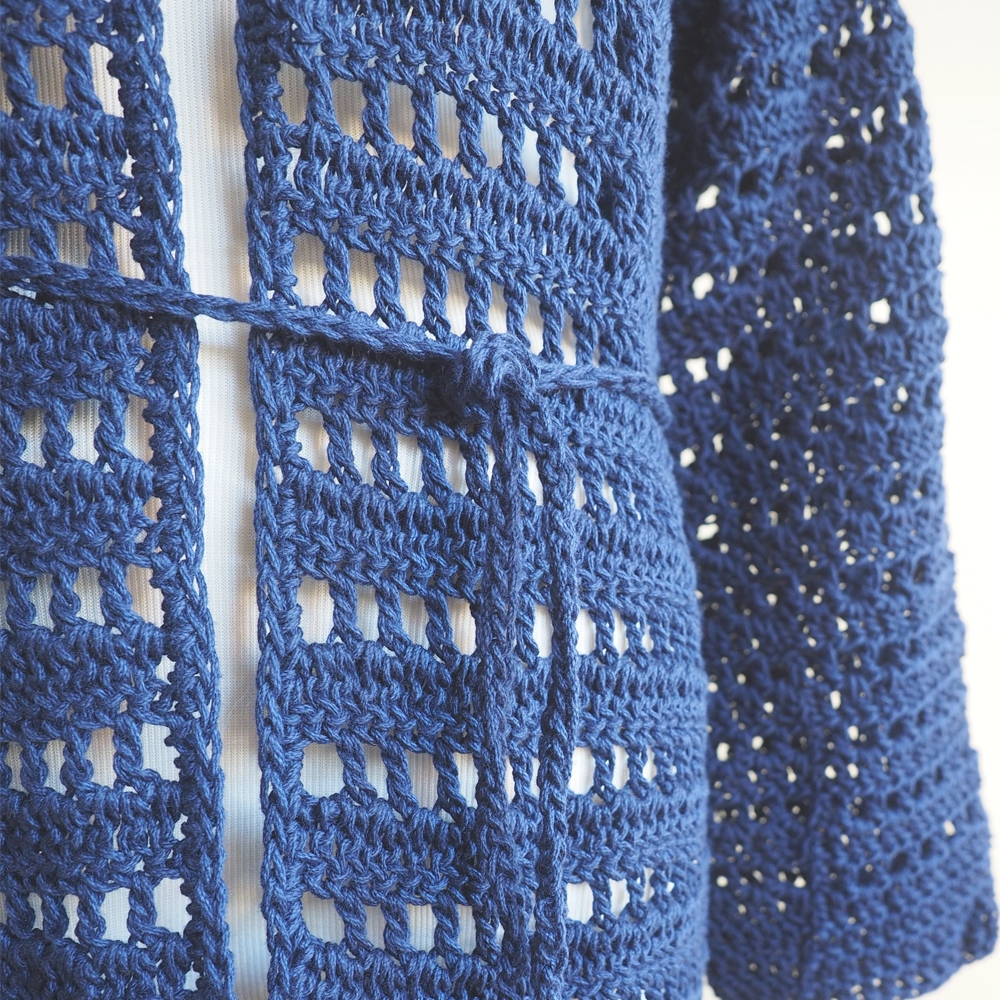
I-cord belt:
Ch 3. Insert hook into 2nd ch from hook, yarn over and draw up a loop, insert hook into next ch, yarn over and draw up a loop (3 loops on hook).
Row 1: Drop 2 loops from hook. Hold onto the dropped loops with your non-hook hand so they don’t come undone. Yarn over and draw through remaining loop on hook. Insert hook into first dropped loop, yarn over and draw through (2 loops on hook). Insert hook into second dropped loop, yarn over and draw through (3 loops on hook).
Repeat Row 1 until i-cord is approx 50” long. Cut yarn, leaving a long yarn end. Draw end through all 3 loops on hook and pull tight to fasten off.
Weave i-cord through each side of the sweater at waist height.
Weave in all ends.
Looking for more great crochet patterns: 37 Free and Unique Crochet Cardigan Patterns You’ll Love to Crochet
We know you’ll wear your belted kimono cardigan year round and give it all the love it deserves. A cardigan is so easy to throw on, and it can immediately elevate your style.
You can even share this look with your friends. But they’ll have to make their own. This one is yours!
Peplum Top Crochet Pattern
Mini Wrap Crochet Pattern

Denise
Sunday 2nd of October 2022
Are there instructions for larger or smaller sizes?