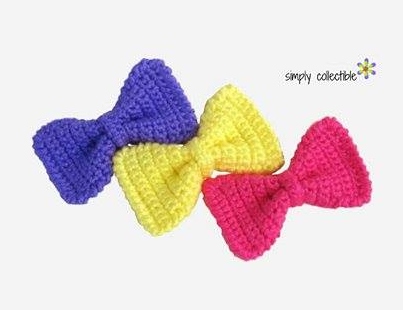
Now you can crochet a bow tie from this pattern in just under 20 minutes with interruptions! This crochet pattern is to make a bow tie measuring 4” x 2”. I am putting these on my Christmas tree this year- simple and easy bow ties! I’ve clipped them on to shoes & slid them on hair bands. They’ve been sewn on to market bags, baby shoes and slipped on to doggie collars.

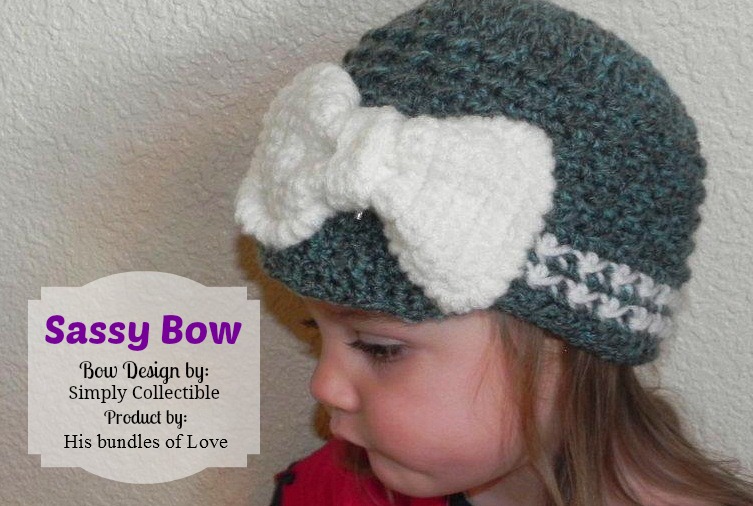
Sassy Bow crochet pattern
Hello Kitty fans can run a clip or barrette through it and make it their own. Imagine this as a belt buckle or on a hat. You can make anything cuter and more vibrant with a bow tie of any color imaginable! Use them as embellishments for your Baby’s outfits or headbands. I spent months searching for a cute bow tie pattern I liked and decided to wing it. This works up within the hour (with interruptions) and is delightful and simple. After you make a couple of these, check out this adorable roundup of 21 Free Fabu Frozen Crochet Patterns!
Materials need:
Caron’s Simply Soft
F-hook
Yarn Needle
Scissors
Abbreviations:
ch- chain
sc- single crochet
sl st- slip stitch
ea- each
st- stitch
sts- stitches
Special Stitch- Crab Stitch (aka- Reverse Single Crochet):
After completing your first sc, insert hook into the first space immediately to the right (working in reverse order). Yo, pull up a loop, yo, pull through both loops on hook.
Continue working in reverse until the pattern gives other instructions. The Crab Stitch creates a nice twist
for this edging.
Finished product is 4” x 2.5”
Body of the Bow Tie:
R1: ch12, sc11 across, ch1, turn
R2-20: sc11, ch1, turn
Fasten off leaving a 16 inch tail that you will crab stitch around the edge. Crocheting around the tail will help thicken and stiffen the edge.
With a new strand, start anywhere you feel comfortable and crab stitch around making sure to place 3 crab stitches at each corner. End at the first crab stitch and fasten off. Sew in the ends. (I like to start my first at the corner and end by making my last 2 in that same corner to total my 3.) Fold the center together and run yarn through it to sew into its fold or simply tie around it to secure it.
Center of Bow Tie:
The length is to your discretion to leave enough room to allow for the collar/headband to pass through.
R1: ch10 to 15 or desired length, turn, sl st across to end of the chain.
R2: turn, sl st again to end and fasten off.
You may sew it onto the bow and fasten closed or leave it open to customize.
Thank you for your support!
Check out more free crochet patterns on my Free Crochet Patterns page!
Nathalie Brault
Monday 29th of October 2018
what a cute little bow, thank you so much for sharing Nathalie
Sigrid
Wednesday 9th of December 2015
This is simply adorable! Thank's for your inspiration!
Celina
Saturday 12th of December 2015
My pleasure!
Natalie Robbins
Wednesday 9th of December 2015
The bow is so pretty. I need to make this for the hat I loom knitted for my niece. Ho do I sign up for your emails? I love your projects.
Celina
Saturday 12th of December 2015
Sounds wonderful, Natalie! The best way to receive email notices is to click and sign up for the rss feed at the top. The icon looks like a speaker or signal "waves." My newsletters are sporadic so that is the best way to keep up. Thanks for asking and coming by!
Anastasia
Friday 30th of October 2015
Amazing simple pattern! Used it for a halloween costume! :D
Tamara Pierce
Monday 19th of January 2015
Perfect for headbands and hat accents. Love it.