The pattern below truly speaks for itself. Give it a try and see for yourself how it's loved by everybody (yes, every one who's young-at-heart and of course, the children) or get the ad-free printable PDF pattern here!
Every time I sit down to think of what I can write about this Most Egg-cellent Egg Apron crochet pattern, I blank. I mean, look at the cuteness! This design is so simple and so stinkin' adorable that it blindsided me. Totally blindsided me. So, I could write about how easy it is, or how stinkin' cute it is, or how colorful it is, or about the cute factor, or the cuteness…. Stop me!
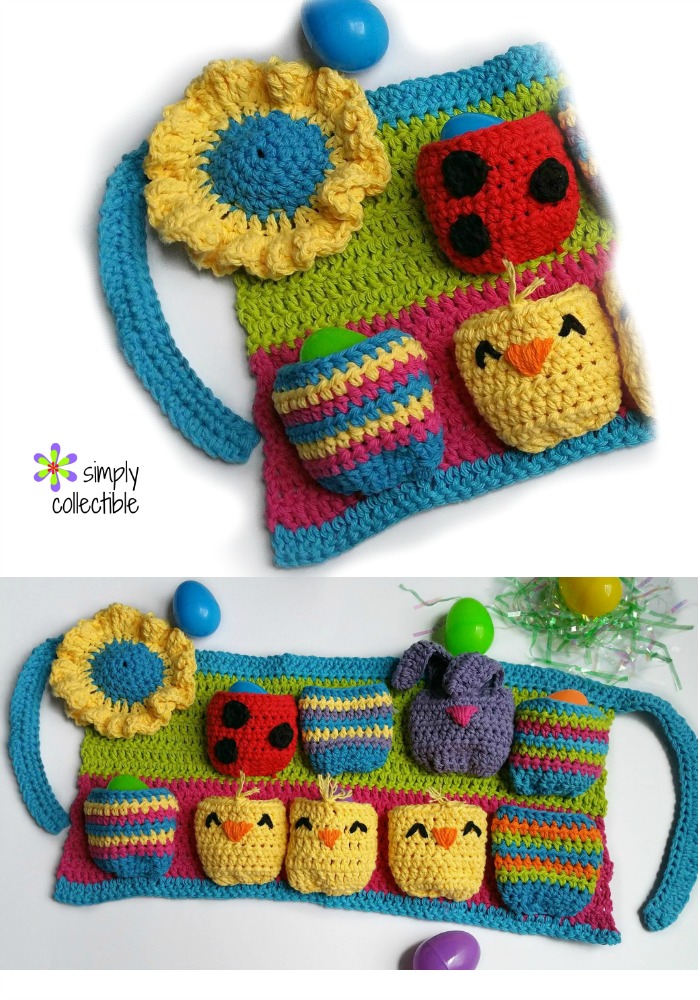
Most Egg-cellent Spring Egg Apron
Just look at it! Love it. Tell your friends. Tell me how much you like it. I hope it makes your heart smile as it does mine. I made it in a child size, but I may use it decoratively for Easter. What if I just hang it on my front door? lol. Maybe I can plant an herb in each pocket!

Skill Level: Intermediate
Materials:
• Hook
– US Size H/8 (5 mm) crochet hook or size needed to obtain gauge
• Yarn: Worsted weight yarn
– 100 [150] yds blue
– 100 [150] yds green
– 100 [150] yds pink
– 100 yds yellow
– 50-60 yds purple
– 25-30 yds orange
– 50-60 yds red
– 10-20 yds black
• Notions:
– Scissors
– Yarn needle
Get the ad-free printable PDF pattern here
Size:
• Child [Adult]
• Tie length: 40 [60]
• Panel Width: 20 [30] inches
Gauge:
12 hdc x 9 rows = 4 inches
| ABBREVIATIONS | DESCRIPTION |
|---|---|
| ch | Chain |
| dc | Double crochet |
| hdc | Half double crochet |
| rnd | Round |
| RS | Right side(s) |
| sk | Skip |
| sl st | Slip stitch |
| st(s) | Stitch(es) |
| tr | Treble crochet |
Pattern
Get the ad-free printable PDF pattern here
TIE STRAP:
With blue, ch 121 [181].
sk = skip
sl st = slip stitch st(s) = stitch(es) tr = treble crochet
To increase length, add 30 chs for every 10 inches.
Row 1 (RS): Hdc in 2nd ch from hook and each ch across. (120 [180] hdc)
Row(s) 2 [2-4]: Ch 1, turn, hdc in each st across.
Fasten off.
PANEL:
Continuing from last row of tie, turn, sk first 30 [45] sts on last row worked, join green with sl st in next st.
If you increased tie length, sk 45 sts as for adult size, then on row 1, add the same number of hdc that you added to the tie length. You should have 45 sts remaining at the end of the row.
Row 1 (RS): Ch 1, hdc in each of next 60 [90] sts, leaving remaining 30 [45] sts unworked. (60 [90] hdc)
Rows 2-8: Ch 3 (counts as dc throughout), turn, dc in next st and in each st across. (60 [90] dc) Change to pink.
Rows 9-15: Ch 3, turn, dc in next st and in each st across. Change to blue.
Row 16: Ch 3, turn, dc in next st and in each st across.
Fasten off.
Weave in all ends.
FLOWER:
Join rnds where indicated with a sl st in the first st of the rnd.
With blue, ch 3, leaving a long tail for sewing.
Rnd 1: 6 hdc in 3rd ch from hook, join. (6 hdc)
Rnd 2: Ch 1, 2 hdc in each st around, join. (12 hdc)
Rnd 3: Ch 1, 2 hdc in first st, hdc in next st, [2 hdc in next st, hdc in next st] around, join. (18 hdc)
Rnd 4: Ch 1, 2 hdc in first st, hdc in each of next 2 sts, [2 hdc in next st, hdc in each of next 2 sts] around, join. (24 hdc) Change to yellow.
Rnd 5: Ch 1, 2 hdc in first st, hdc in each of next 3 sts, [2 hdc in next st, hdc in each of next 3 sts] around, join. (30 hdc)
Rnd 6: Ch 3 (counts as dc), 3 tr in first st, [dc, 3 tr] in each st around, join. (30 dc, 90 tr) Fasten off, weave in all ends except for long starting tail.
POCKETS:
Basic pocket design is used for all the pockets, with color changes and embellishments for the various designs. Feel free to mix and match designs. Yardage listed makes 4 [6] striped pockets, 3 chick pockets, and 1 bunny pocket.
If you increased the panel width, add 2 more pockets for every 10 inches increased.
BASIC POCKET:
Ch 11
Row 1: Dc in 3rd ch from hook (skipped chs count as first dc), 2 dc in each ch across. (20 dc)
Rows 2-8: Ch 1, turn, hdc in each st across. (20 hdc)
Fasten off, leaving a long tail for sewing.
Get the ad-free printable PDF pattern here
STRIPED EGG POCKET:
Make basic pocket, changing colors as follows:
Row 1-2, 5 & 8: Blue
Rows 3 & 6: Contrast color (green, pink, yellow, purple, or orange)
Rows 4 & 7: Different contrast color (green, pink, yellow, purple, or orange)
Make basic pocket, changing colors as follows:
Row 1-2, 5 & 8: Blue
Rows 3 & 6: Contrast color (green, pink, yellow, purple, or orange)
Rows 4 & 7: Different contrast color (green, pink, yellow, purple, or orange)
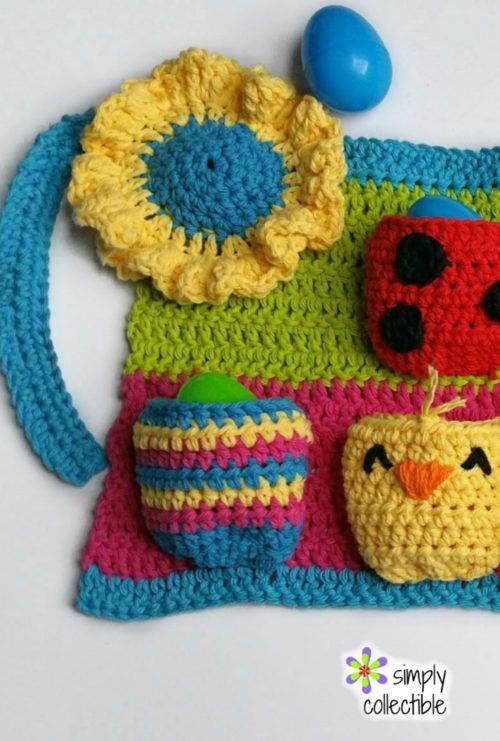
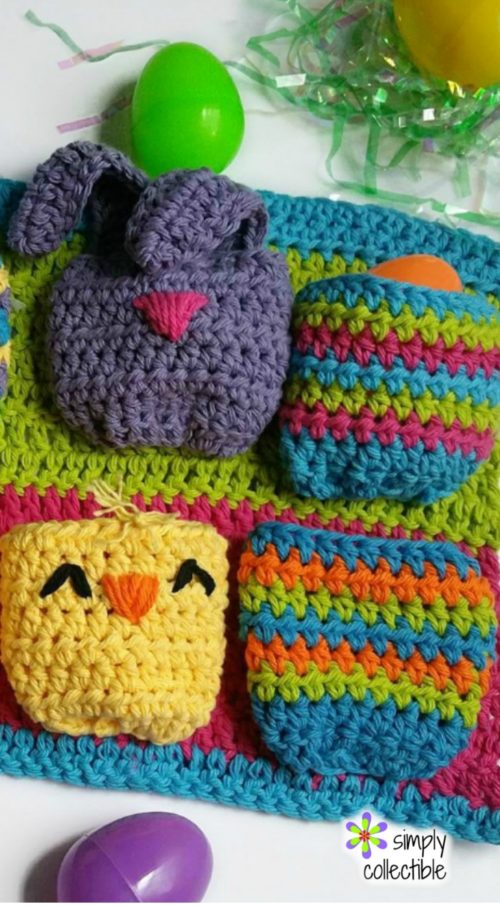
CHICK POCKET:
Make basic pocket in yellow.
Embroider triangle shaped beak with orange, approximately in the center of rows 5 and 6. Embroider V-shaped stitches in black for eyes, above and centered across beak. Cut a 4-inc strand of yellow and tie it to the center of the top edge of the pocket with a knot. Trim and fray the ends to create a tuft.
LADYBUG POCKET:
Make basic pocket in red.
Spot (make 3): With black, ch 2, 6 hdc in 2nd ch from hook, join with sl st to first st. Fasten off leaving a long tail for sewing.
Using tails, sew spots onto pocket as desired, weave in all ends.
BUNNY POCKET:
Make basic pocket in purple.
Ear (make 2): With purple, ch 17, hdc in 2nd ch from hook, tr in each of next 14 chs, 3 tr in last ch, working in opposite side of chs, tr in each of next 14 chs, hdc in last ch. (2 hdc, 31 tr. Fasten off, leaving a long tail for sewing.
Using tails, sew ears to top of pocket, about 5 stitches in from each end.
DUCK POCKET:
(Not pictured or included in yardage)
Make basic pocket in white.
Embroider triangle shaped beak with orange, approximately in the center of rows 5 and 6. Embroider V-shaped stitches in black for eyes, above and centered across beak.
BEE POCKET:
(Not pictured or included in yardage)
Make basic pocket in yellow, changing to black for row 4 and row 6.
Get the ad-free printable PDF pattern here
ASSEMBLY:
Using long tails:
Sew flower to top corner of apron, where the tie meets the panel (on either side). Sew 5 [6] pockets evenly spaced along bottom half of apron panel. Fold the side edges in slightly, making the pocket cup outwards, then sew around the side and bottom edges. If you increased the panel width, add 1 more pocket on the bottom for every 10 inches increased. Sew remaining pockets on the top half of the apron, above each of the lower pockets except where the flower is.
Weave in all ends.
I hope you love it as much as I do!
Liz
Wednesday 13th of December 2023
Looks gorgeous can’t wait to get started Must just get some wool Thank you got the pattern
Glenis
Friday 26th of August 2022
Is there a video for this pattern? I’m terrible at written instructions. I do better by watching.
Susan
Tuesday 5th of September 2017
THANK YOU FOR SHARING!!!XOXO I am also blind sided with your gorgeousness of the egg - cellent apron. We have three chooks Bertha, Helen and Karen and we - my 20 month old granddaughter and I found our very first egg this morning. I'm currently making your apron and loving it as I'm a basic crocheter and can follow it -------- as my girl will be able to wear her apron to collect the eggs. Thanks again ????
Celina
Tuesday 12th of September 2017
That is delightful! Congratulations with those ladies! I bet your granddaughter is going to have a lovely time making wonderful memories. Thank you for coming by to tell me, Susan.
Caitie
Monday 8th of May 2017
This is such a sweet pattern! Thank you so much for sharing :) Definitely going on my to do list for next Easter.
Celina
Tuesday 9th of May 2017
Thank you for your kind words! I know it's perfect for Easter, but it's great for spring, too. :D
Gail E. Kraft
Tuesday 25th of April 2017
I just love this pattern. It is so cute! :)
Celina
Tuesday 9th of May 2017
Thank you so much, Gail!