How to Crochet a Circle
Crocheting a circle can provide a great foundation for so many things including hats, circular rugs, motifs, appliques, decor, ornaments… you name it!
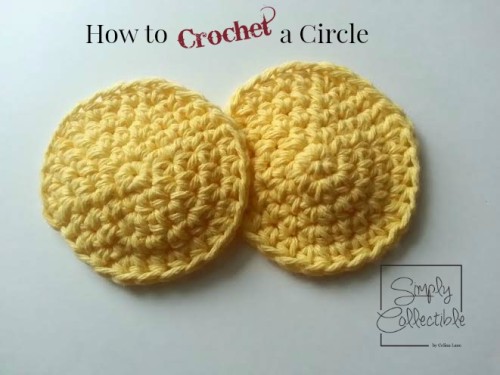
This is so basic and I have chosen to show you in the round using half double crochet. You should find it quite pleasant and simple to move upward from this basic foundation. You may use any stitch you like for this formula and any yarn your project calls for along with a hook that gives you the required gauge. If you are making a project from scratch, you may use the hook indicated by the yarn label.
Let's get started. Increasing means you will make two stitches in the same stitch.
Materials needed:
Yarn
Hook
Stitch marker – to mark your round starts
Scissors
Yarn Needle – to sew in your ends
R1: chain 3, hdc 6 (half double crochet) in the 3rd chain from the hook, do not join, do not chain (6 sts)
R2: hdc increase in each stitch of the previous round (12 sts)
R3: * hdc, hdc increase * (repeat from * to * 6 times – 18 sts)
R4: * hdc 2, hdc increase * (repeat from * to * 6 times – 24 sts)
R5: * hdc 3, hdc increase * (repeat from * to * 6 times – 30 sts)
R6: * hdc 4, hdc increase * (repeat from * to * 6 times – 36 sts)
Continue increasing the stitches in the same sequence for each round to make larger pieces. I find that working in the round this way tends to make less of a hexagonal shape than starting a new round with a slip stitch, but it will cause more of a jog or slant if you are changing colors. When you reach the size you need, skip a stitch and slip stitch in the next. Fasten off and sew in your ends. That's it!
Now you can make these!

Click HERE to find the 8-ball tutorial
Click HERE to find the Smiley tutorial